


Knowing how to lay porcelain paving slabs correctly is key to creating a patio that not only looks exceptional when it's first installed but continues to perform for years to come. While porcelain paving is valued for its durability, low maintenance and premium finish, achieving the best results depends on proper installation. From preparing a solid sub-base to using the correct bedding mortar and primer, every stage plays an important role in creating a stable, long-lasting patio.
When installed correctly, porcelain tiles offer exceptional longevity, retaining its appearance for many years with minimal maintenance. By following the correct installation methods from the outset, you can create a patio that is not only visually striking but also built to withstand the demands of everyday use and the changing seasons.

Can You Lay Porcelain Paving Slabs Yourself?
Yes, you can lay porcelain paving slabs yourself if you are confident with outdoor DIY and understand the preparation involved. It is not necessarily difficult, but it does require some precision and attention to detail.
For a small patio or simple pathway, experienced home renovators may feel comfortable taking on the project. For larger patios, intricate layouts, raised areas or spaces where drainage is more complicated, we would usually recommend using a professional landscaper or installer.
The most important thing is not to rush the early stages. A beautifully laid porcelain patio begins below the surface with thoughtful preparation.


What Are Porcelain Paving Slabs?
Porcelain paving slabs are made from carefully selected clays and minerals, which are pressed and fired at extremely high temperatures to create a dense, durable surface. The result is paving that's exceptionally strong, low maintenance and built to withstand the British climate, resisting frost, moisture and engrained staining throughout the seasons.
One of porcelain's biggest advantages is its versatility. It captures the look and texture of natural stone, concrete and terrazzo with remarkable realism, while offering a surface that's easier to care for. Unlike many natural materials, porcelain paving doesn't usually require sealing, and regular sweeping with the occasional wash is often all that's required to keep it looking its best.
Explore our full collection of porcelain paving to discover a wide range of colours, finishes and sizes, designed to suit every style of outdoor space.


Tools And Materials You'll Need
Before starting, gather everything you need so the installation can be approached methodically.
Materials
- Porcelain paving slabs
- MOT Type 1 sub-base
- Sharp sand
- Cement
- Porcelain slurry primer
- Exterior porcelain grout
- Joint spacers
- Clean water
Tools
- Spade
- Wheelbarrow
- Plate compactor
- Spirit level
- String line
- Tape measure
- Trowel
- Rubber mallet
- Mixing equipment
- Porcelain tile cutter or angle grinder with a porcelain blade
- Bucket and sponge
Safety Equipment
- Protective gloves
- Safety goggles
- Knee pads
- Dust mask when cutting porcelain
Porcelain slabs can be heavy, and cut edges may be sharp, so ensure you take care when lifting, handling and cutting. If using power tools, always follow the manufacturer’s safety guidance.

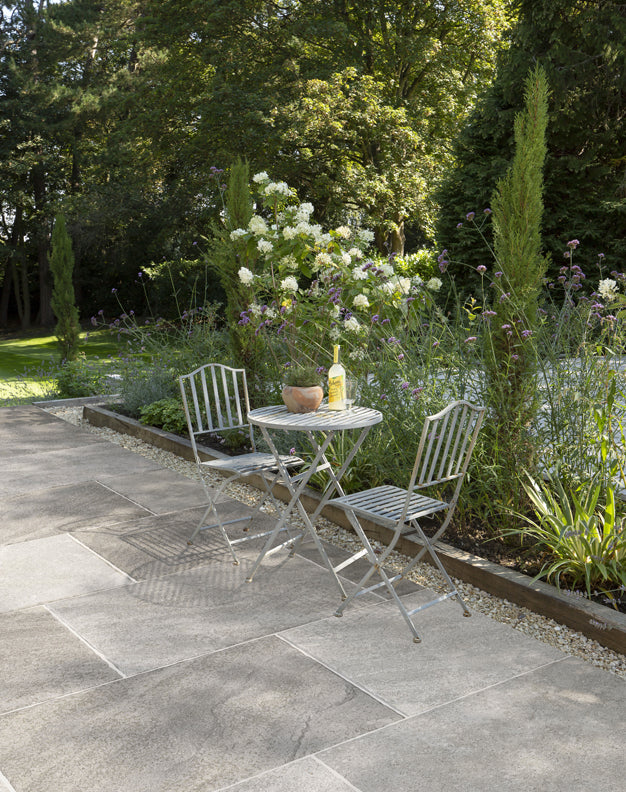


How To Prepare The Ground For Porcelain Paving
The preparation stage has the greatest impact on the final result. If the ground is not stable, the paving above it may move, settle or become uneven with time.
Before laying any porcelain slabs, take some time to carefully mark out the area using pegs and string lines, checking the diagonals to ensure the layout is perfectly square. Precision at this stage sets the standard for everything that follows. Remove any turf, plants, roots and loose material, then excavate the ground to allow enough depth for the sub-base, mortar bed and porcelain slab.
As a general guide, most patio installations require an excavation to a minimum depth of around 160mm (but typically 170-180mm). This can vary depending on the condition of the ground, the depth of your tiles and the intended use of the space.


Once excavated, the area should be levelled and compacted thoroughly. Soft spots should be addressed at this stage rather than covered over, as they may cause problems later.
It is also important to plan the fall of the patio before laying begins. We recommend a slight gradient of 1:60 to allow rainwater to drain away from the house and prevent water sitting on the surface. Also, as a general rule, the patio should sit at least 150mm below your property's damp proof course, helping to protect external walls from excess moisture and damp.
Before laying, use string lines to mark out the finished patio level and establish the direction of the fall. This will help you maintain a consistent gradient across the patio and ensure water drains away from the property.

Installing A Stable Sub-Base
A well-constructed sub-base provides the stable foundation needed for a porcelain patio to perform beautifully for years to come.
Spread your MOT Type 1 aggregate evenly across the prepared area, to a minimum depth of around 100mm. This should be compacted in layers using a plate compactor until the surface feels firm and stable underfoot.
A solid sub-base helps distribute weight evenly, reduces movement and supports the paving through seasonal changes in weather and temperature.

Creating A Full Mortar Bed
Porcelain paving should always be laid on a full mortar bed. This means the entire underside of each slab is supported, rather than relying on small spots of mortar.
Spot or ribbon fixing should always be avoided. It can leave hollow areas beneath the slab, which may lead to movement, cracking or weak spots underneath your patio.
A typical mortar mix will use 5 parts washed sharp sand and 1 part cement, prepared to the appropriate consistency for external paving. The mortar should be workable but not too wet, allowing each slab to be bedded securely and evenly.
Spread the mortar across the area to a thickness of around 40-50mm, where the slab will be placed, ensuring there are no gaps underneath. The aim is to create continuous support beneath every piece of porcelain.


Applying A Slurry Primer
Because porcelain is so dense, it needs a slurry primer to create a secure bond between the slab and the mortar bed. Without it, the paving may not adhere properly and could become loose over time.
Using a brush or roller, apply a thin, even coat of SBR slurry mix (made from 5 parts cement, 1 part SBR and 1 part water) across the entire underside of each porcelain slab. This step should be done with care and intention, as a clean application ensures the strongest possible bond. Any accidental contact with the face of the tile should be wiped away immediately with clean water before it has time to set.
Laying The Porcelain Paving Slabs
Once the base is prepared, the mortar bed is ready and the primer has been applied, you can begin laying the porcelain slabs.
Carefully lower each porcelain tile onto the mortar bed and tap it gently into position using a rubber mallet. Check the level regularly and use a string line to keep the layout straight and consistent.
Keep joint widths consistent throughout the installation. This gives the patio a more professional finish and makes the grouting stage much easier.

Allowing The Patio To Cure
Once the slabs have been laid, the mortar bed needs time to cure before the joints are filled. As a minimum, we always recommend waiting 36 hours before walking on the patio or applying grout as movement can disturb the slabs before they have properly bonded. The curing time will depend on the weather and the products used, so always follow the manufacturer’s recommendations.
This is another stage where patience pays off. Grouting too soon can affect the stability of the installation and compromise the final result.
Grouting The Joints
Once the paving has cured, the joints can be filled using an exterior grout suitable for porcelain paving. Apply the grout carefully, ensuring the joints are fully filled. Any excess should be removed from the surface promptly before it dries. Well-finished joints make a considerable difference to the overall appearance of the patio.
Choosing the right grout colour is just as important as selecting the paving itself. A well matched grout should complement the tile rather than draw attention to the joints, creating a more seamless, considered finish. Soft greys, warm neutrals and natural stone tones are all popular choices for porcelain paving.
We recommend using Kerakoll Fugabella Colour Grout (pictured) with both our porcelain and natural stone paving. To make choosing easier, we've paired each of our paving ranges with a coordinating Fugabella shade, so you can be confident you're selecting a grout colour that perfectly complements your tiles.


Common Mistakes To Avoid
Skipping The Slurry Primer
This is one of the most common causes of loose porcelain slabs. An SBR slurry mix is essential for creating the bond between the paving and mortar bed.
Using Spot Bedding
Porcelain slabs should be fully supported underneath. Spot or ribbon bedding can create hollow areas and increase the risk of movement or cracking.


Rushing The Sub-Base
A patio is only as stable as the base beneath it. Poor compaction or insufficient depth may lead to settlement over time.
Forgetting Drainage
Every patio should have a slight fall to allow rainwater to naturally drain away. Without it, water may sit on the surface or collect against the property.
Grouting Too Early
The mortar needs time to cure before grout is applied. Rushing this stage can disturb the slabs and affect the final result.


Some Of Our Favourite Porcelain Paving Options
Stone-effect porcelain paving
Stone-effect porcelain paving combines the timeless character of natural stone with all the practical benefits of porcelain. It offers a consistent finish, requires very little maintenance and creates outdoor spaces that feel elegant, inviting and built to last.
These designs are particularly well suited to traditional gardens, country homes and courtyard settings, where softer tones and natural textures complement the surrounding landscape.
Our Hambleton Beige Stone Effect Porcelain Paving (left) is an excellent choice for creating warm, welcoming patios. Inspired by the subtle variation of natural limestone, its soft beige tones bring a classic, understated look that works beautifully in both traditional and contemporary gardens.
For a darker, more weathered appearance, Montpellier Gris Tumbled Porcelain Paving (right) recreates the character of aged natural stone with delicate tonal variation and authentic surface detail. It offers all the charm of genuine stone while retaining the durability and low-maintenance qualities porcelain is known for.


Limestone-Effect Porcelain Paving
Limestone-effect porcelain paving offers the timeless beauty of natural limestone with the practical advantages of porcelain. Soft tonal variation, subtle surface detail and warm, natural hues create a relaxed, elegant look, while the durable porcelain construction ensures the paving remains easy to maintain year after year.
Our exclusive Dijon Rendition® by QS Stone Effect Porcelain Pavers (left) are inspired by the distinctive character of authentic Dijon limestone, faithfully recreating its natural texture and gentle colour variation while delivering all the durability and low-maintenance benefits of porcelain. The collection is also available in both the lighter Dijon Blanc (right) and warmer Dijon Beige, giving you the flexibility to choose the shade that best complements your outdoor space.
Ideal for both traditional and contemporary gardens, limestone-effect porcelain creates outdoor spaces that feel bright, welcoming and effortlessly refined.


Porcelain Cobbles
Porcelain cobbles are an excellent way to introduce character, texture and definition to an outdoor space. Whether used to create winding garden paths or to add decorative detailing and zoning, they bring the timeless appeal of traditional cobbled paving while offering all the practical advantages of porcelain.
Our exclusive Dijon Rendition® by QS Rustic Edge Porcelain Cobbles (left) have been designed to pair seamlessly with the rest of our Dijon Rendition® Porcelain Paving collection featured above. Inspired by the distinctive beauty of authentic Dijon Limestone, they faithfully recreate its subtle textures, fossils and natural colour variation, while their gently distressed edges enhance the look of timeworn stone. The result is an incredibly realistic porcelain cobble that's perfect for patios, pathways and borders.
For a more traditional feel, Montpellier Sable Rustic Edge Porcelain Herringbone Cobbles (right) offer a beautifully aged appearance with softly tumbled edges and warm, natural tones. Their classic herringbone format is ideal for garden paths, courtyards and feature areas, bringing timeless character and craftsmanship to both period and contemporary landscapes.


Coordinating Indoor & Outdoor Porcelain Tiles
For projects where you want to create a seamless connection between your home and garden, coordinating indoor outdoor porcelain tiles are an excellent choice. Using the same or complementary finishes across both spaces helps blur the boundary between indoors and out, creating a more open, cohesive feel that's perfect for modern living.
Our Lullington Beige Stone Effect Porcelain Pavers (left) is available in coordinating indoor and outdoor finishes, making them perfect for creating a continuous flow while retaining a softer, more characterful aesthetic. With their gently tumbled, stone-inspired appearance, they're ideal for homes that favour a timeless, rustic style.
For a more contemporary look, Dorchester Aged White Stone Effect Porcelain Pavers (right) are also available in matching indoor and outdoor formats. Its refined finish and modern aesthetic make it an excellent choice for extending minimalist kitchens and living spaces seamlessly onto the patio.


Frequently Asked Questions
What should porcelain slabs be laid on?
Porcelain slabs should be laid on a full mortar bed with a suitable slurry primer applied to the underside of each slab. They should never be spot bedded.
Are porcelain paving slabs difficult to lay?
Porcelain paving is not necessarily difficult to lay, but it does require accuracy and the right materials. The installation is more precise than some traditional paving methods, particularly because of the need for slurry primer and full mortar coverage.
Do porcelain paving slabs need sealing?
Most porcelain paving slabs do not need sealing. This is one of the reasons they are such a popular low-maintenance option for patios and outdoor spaces.
Can porcelain paving be laid in wet weather?
It is best to avoid laying porcelain paving in heavy rain or very wet conditions. Excess water can affect the mortar, primer and grout, making it harder to achieve a reliable bond and clean finish.

Create a Porcelain Patio Built to Last
Understanding how to lay porcelain paving slabs correctly is essential if you want a patio that feels considered, performs well and remains beautiful over time. The visible finish may be what you notice first, but it's the preparation beneath that determines how well your patio performs for years to come. A compacted sub-base, full mortar bed, suitable slurry primer and careful grouting will all contribute to a stronger, longer lasting installation.
We hope you have found this comprehensive guide on how to lay porcelain paving slabs useful for your own patio project. If you're planning a complete garden transformation, both of our Porcelain Patio Ideas or Best Porcelain Tiles Ideas guides are full of inspiration for designing a beautifully connected outdoor space.
We invite you to visit one of our UK tile showrooms to view large floor and wall displays, along with individual tiles and free samples of our collection. Alternatively, please feel free to get in touch with Quorn Stone for any questions or advice!


